Monday, May 27, 2013

T-Shirt Quilt

Whew, what a weekend! My daughter graduated on Sunday and her party was directly after. In the few minutes before her party I made her pose with her quilt.

She has been very active in sports and is a smarty pants as well! I put this quilt together in March and took it to be quilted by a long arm quilter. This is only the second quilt that I have allowed someone else to quilt. Both experiences were great!

Go figure, she picked running horses. She is a horse nut, loves all animals, and is going to college in the fall to begin studies for Pre-Veterinary medicine.

You may have noticed that most of the shirts are green, so why orange and black for the sashing and backing? Well, she didn't want black like her sister, so we decided to use her college colors, orange and black. Watch out University of Findlay, here she comes.

T-shirt quilts are not difficult to piece, especially this pattern. Getting the cornerstones to match up in the right place is the hardest part. One tip for sewing these together is to always sew with the t-shirt piece up. I am not sure why this works so much better, but if the t-shirt side is down, the pieces shift and bunch.

If you decide to make one of these, the worst part is fusing the interfacing to the backs of the shirts. Making this quilt, I think I counted to 10 Mississippi at least a hundred times. I was thinking that a heat press might work to speed this up. Anyone tried this? Someone offered to let me use theirs. Wonder if the interfacing would hold up?

Things should slow down for me in the next week or two with the last track meet tomorrow and only 3 more weeks of school left before our summer vacation. I am dreaming about the hours I will be able to sew. There are only about a dozen projects I have lined up in my mind to make next. Looking forward to turning on the machine this week!

Heather


Sunday, May 5, 2013

The Weekender Bag

Since I have finished the baby quilts, with a little time to spare, I was able to work on a project I have been dying to get started! While working on the baby quilts I began assembling the supplies necessary to put together a Weekender Bay (Amy Butler). These bags have been all over blogland and I really wanted one. My goal was to finish mine before my husband and I go away for our annual Anniversary trip. Here we are over a month ahead of time and it is finished.

Isn't it fabulous? I love it. There is enough interfacing in this bag to carry two bowling balls on our trip, but I think I will just pack clothes instead. They are a little more practical.

This pattern by Amy Butler was challenging, but if the directions are followed, the bag will turn out great. I am used to sewing quilted bags with cotton batting on the insides. The idea of using not one, but two types of interfacing was strange. Despite this, I followed the suggestions and couldn't be happier with the way the bag turned out. I may even have to use this double interfacing concept on some of my other bags, if I want them to stand on their own.

While assembling the bag, the directions said to use binder clips to hold the pieces together while sewing. Go figure, the teacher has all of her binder clips at school and couldn't possibly wait until Monday to finish the bag, so I just used some super heavy duty pins I used to use when I stretched quilts on a frame. They worked fine, but if I ever make this bag again, I would like to try the binder clips. It may be just a smidge easier.

This is my first attempt at pattern matching. One side turned out great, the other looks good, but not quite a match. I need to choose an easier point in the pattern to match, like I did on the first side. Lesson learned.

Don't you just love happy accidents? I did not plan for these zipper panels to line up like this and create a snake like pattern, but isn't it cool? Pretty sure I couldn't make that happen again in a million years.

If you would like to make this pattern, don't be afraid, just read the directions carefully and be prepared to spend almost a whole day cutting out the pieces.

Notice how the bag I made in Florida coordinates with my new Weekender bag? I have plans for one more medium sized bag to go with these two. Both of these bags are made out of fabrics from the Juggling Summer line from Moda. There will more than likely be enough scraps for a few other travel items to go along with the set. Now that I have matching luggage maybe I will have to travel more often!

Now I need to get cracking on the Mother's Day gifts I have planned for next Sunday. Off to the machine.

Heather


Wednesday, May 1, 2013

My Winter With The Lorax


There are going to be three new bundles of joy entering our family this spring. My brother and his wife, my niece and one of my nephews are all expecting fairly soon. This means that I have spent the winter sewing up a storm for these new arrivals. I do love picking out and making baby quilts. While obsessively seeking the perfect projects for these babies, I found an awesome quilt kit for The Lorax fabrics by Robert Kaufman. This kit included a panel that had illustrations from the book. Perfect! One quilt picked out.

This is from a free pattern available from Kaufman fabrics, called I Speak For the Trees. I had a few problems with the pattern for this quilt. One of the measurements is incorrect, all of the pieces that are cut 13 1/2" should actually be 13" cuts instead. This was an easy fix. The other error is that the panel blocks and the 25 patch blocks wind up being 1/4" different in size. This was easy to fix also, but would have been easier if they were just cut the correct size from the beginning. So if you are making this quilt, check your block size. You may have to trim an 1/8" off of each side of your blocks. Despite the pattern troubles, I love how this quilt turned out. So much so that I made a second one!

This second quilt from the I Speak for the Trees pattern came together much smoother than the first. Knowing what to change before cutting made it so much easier. My brother and his wife should have this quilt, in New York, by the time this is posted.

For the last baby, I happened upon yet another Lorax quilt kit called The Need for Thneeds. This pattern was excellent and the quilt top came together nicely. I was a little nervous about getting the knitting thneeds all lined up and centered all the way across the top. No need to worry, they lined up perfectly (well as close to perfect as I get).

After making all of the Lorax quilts, I have so many scraps! I sure am glad that my two little girls love The Lorax and want several things made from these scraps! Speaking of my little girls, I want to say thank you to them and my husband for taking the time to hold up my quilts on the back deck for these pictures!

There are all of my helpers!

The baby quilts are finished. Now to get on that t-shirt quilt...or maybe something for myself?

Heather


Sunday, April 14, 2013

A Little Early

Some might say these are a little late, I just say they are really early! I made Halloween placemats this fall. The fabrics were just too cute to pass up. After the placemats were finished, I had quite a few scraps left. Looking at the pile of Halloween goodness, I saw a table topper.

Isn't it lovely? I used this pattern to make table toppers last spring. Have you ever skimmed through the directions on a pattern you have made before. All the while, thinking "Oh yes, I remember how this goes?" This is the feeling I got when reading the directions. Well, after piecing the topper, I couldn't quite put my finger on what was wrong.

This pattern will make two table toppers with just a little extra main fabric (solid black) and backing fabric, so I always make two. I finally figured out what went wrong when I put the second one together.

Notice on this table topper that the black fabric with the eyes makes a really nifty point that appears to be behind the colored triangles? I sewed these in the wrong direction on the first one. The first one still looks cool, so I decided to keep it that way.
My 9 year old will be making Halloween placemats that coordinate with these table toppers, so I think I will keep one of these for her when she gets older. I know that is a long time from now, but it will be here before know it.
Off to sew something! Maybe I should finish the last baby quilt or should I work on the very bright spring midi bag that is calling my name? Decisions, decisions.
Heather


Sunday, April 7, 2013

Vacation

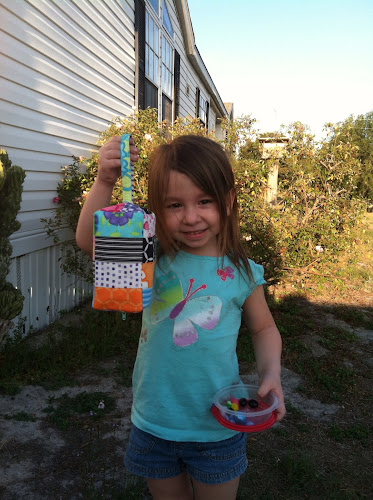
I spent this last week in sunny Florida with my family. My Mother-in-Law is a quilter also! This yearly trip always includes a day trip to some local quilt stores. This year while shopping my Mother-in-law spotted an adorable pattern for a little bag called This and That. I am a sucker for bag patterns, so I bought the pattern and the supplies to make it.

She was nice enough to share her sewing machine with me, since she was making a baby quilt. I spent two days of break using the down time between activities to put together some This and That bags.

While my mother-in-law pressed or cut, I sewed. It worked out well and I put together four bags. Originally, I intended for three bright colored bags to be for my 17 year old, 9 year old, and me. Somewhere along the way I realized that I forgot the 4 year old. How could I? So I gave her mine and made one for myself with Moda's Juggling Summer fabrics.

These bags were super fast and easy! I made all of these in two days while sharing a machine and going out to do other things! No need to fear the zippers on these, they were easy to add and look great.

This pattern calls for one charm pack and one fat quarter. For these three brightly colored bags, I used one charm pack and three fat quarters. This would be a great project to use up some scraps, which I have in abundance of around here!

Off to get ready for the work week and sew a little something!

Heather


Saturday, March 16, 2013

Triple Zippered Pouch

There are baby quilt and t-shirt quilts flying all over this house. With three babies coming this late spring/early summer and my second daughter graduating in May, my quilt obligations are keeping my hopping and my work space a mess! Oh well, I am having a blast putting all of these quilts together. Since none of these quilts are quite finished, I thought I would share one of my side projects. A triple zippered pouch for each of my little girls seemed like the perfect project to use up The Lorax scraps from all of these baby quilts whizzing around my sewing spaces.
If any of you are like me, a little crazy and a lot busy, you will understand that I drool over all of these amazing projects we see in the billion other blogs that we read. The drooling goes on for a long time because time doesn't allow me to make every project I see right away. Anywho, on to the project.
I got the tutorial from here. A triple zip along at A Quilters Table blog. I am not afraid of zippers, unlike my mother and so many other sewers I meet. In the past, I have been a little leary, but my experiences have taught me that it doesn't take anything more than a seam ripper to fix any mistakes that are made.
This time I made a mistake that couldn't be fixed with a seam ripper. I cut the pieces for my first bag an inch too short. Oh well, just make the bag an inch smaller. Each of the girls had a different favorite Lorax print, so we chose scrap pieces to coordinate with their preferences.
Here is the bag that I cut too small. My third daughter loves the orange fabric with the knitting and Lorax. She uses this pouch to carry her money, which she is very good with by the way.
This is the bag with the correct dimensions. This is for my youngest daughter, who has already used it for many things. The most common use has been to carry her crayons. She likes to put the broken ones in the front pouch.
Both of these bags look great and the tutorial was easy to follow. Thank you Debbie for the great tutorial!
After these three baby quilts are finished, I am thinking maybe fabric baskets with the rest of the scraps. I have my eye on a divided basket from Noodlehead (Anna).
Off to sew something for National Quilting Day!
Heather

Saturday, March 9, 2013

Civil War Reproduction Quilt

I have not been blogging, but I have been sewing like a crazy woman! My Civil War reproduction quilt has been on my UFO list for what seems like forever. It is now finished and on my bed.

This quilt has been pulled out several times to finish. On one of my recent snow days, I decided it was time to finish it. When it was spread out on the floor, I discovered that there was much less to finish than I reallized. Only the two navy borders that go all the way around the outsides needed to be quilted. Taking a few minutes to decide on what to quilt, I came to the conclusion that it needed some straight line quilting.

After finishing the quilting, I realized that this quilt has hung in my bedroom on the quilt rack, mostly finished for at least 5 years. How silly is this?

The centers of the star blocks have this quilting in them. I finished this part shortly after my first FMQ class. This is one of the things that I would like to get better at.

Flying geese abound in this quilt, both in the star blocks and one of the borders.

Back to the machine!

Heather


Friday, February 8, 2013

My New Favorite Cup

Things have been crazy here, but what's new? Even though they have been crazy, I have been sewing up a storm!

One of the things that I was excited about from quilt retreat this year was a Quilt in a Cup mini lesson taught by the host. I didn't finish this at the retreat, but quickly put it together after returning home.

Cute, isn't it? The fabrics that I used for this cup were scraps from the quilt I assemble at retreat (more on that later). I made it in a log cabin pattern, since that is one of my favorites. This came together in about an hour, cutting, sewing, and assembly.


Inside the cup, when you open it up, there is a paper pattern, which I used to make this the right shape. First, I cut out a piece of flannel with the pattern.

I know it doesn't match, but no one will know, right?

Once your foundation is cut out, all you need to do is use fabrics to fill up the pattern. I sewed my fabrics right down to the flannel, as you can see the seam lines on this piece. The instructions call for you to glue the piece in a circular form, but I left mine unglued, so I can store it easier when I decide to change it up.

You can find this cup at your local quilt store or here. This is a great idea for any quilter. Now I know which cup is mine!

One unfortunate side effect of this cup is that the size of scraps I keep has now changed. Not that long ago, I decided that scraps under 2 inches were meant for the kids to make craft projects with. I used 1 1/2" pieces on this cup. The scrap fabrics are already threatening to take over my house... Now they may take over the WORLD!

Off to sew some more!

Heather


Saturday, January 26, 2013

The Snake River Log Cabin

I was working like a crazy lady trying to get my Snake River Log Cabin quilt finished before quilt retreat. Unfortunately, I was so close, yet so far. I can hardly contain my excitement, because one and a half years of sewing is finished and fabulous!

This quilt comes with a little story. My husband and I decided to go away for a long weekend on our 10 year Anniversary. The destination was chosen, Amish Country Ohio. I could hardly contain my excitement. Four days away from the children to be with my husband. This meant eating a meal without having to cut someone else's up, no evening bath ritual, and all of the other things that kids need you to do for them. Not to mention there were going to be oodles of quilt stores to visit.

I bought a few projects to make for Christmas gifts and for my kids. I walked into Grandma Fannies Quilt Barn, just outside of town. On the intial walk through, I spotted the Snake River Log Cabin sample. It was amazing and I fell in love. With a 1 year old in the house I hadn't been doing much quilting for a few years, so I didn't let myself buy the fabric kit or the book. There were so many projects that I already owned at home that needed completed. This quilt was a queen sized lifetime commitment. So I left it there at the shop.

We decided the following year that we enjoyed our get away so much that it needed to be repeated. Off we went to Berlin for a long weekend. Throughout the year I had started my obsessive quilting habit again, so I had decided if Grandma Fannie's still had the kit for the log cabin, it was coming home with me.

I walked into the store, made several rounds, without seeing the quilt or the kit anywhere. I was starting to get a little anxious. This quilt haunted my dreams. I had to have it. So in desperation, I asked the clerk on duty. She told me she thought it was upstairs with the finished quilts. I raced upstairs to find the sample and a few of the fabric packets. Maybe no one else was ready to undertake this queen sized workhorse.

About a month after our trip, I decided to cut it up and get started. My first moment of concern was when I opened a 3+ yard piece of fabric that needed to be cut into 1 1/2" squares. Oh my! The directions were read and many many small pieces were cut. No strip piecing here.

So I pieced and I pieced and I pieced some more. I had to stop and make a t-shirt quilt for my oldest daughter's graduation present. There were also Christmas presents to be made.

Finally I had all 64 blocks finished for the main section of the quilt. But wait, there was a pieced border to be made. Back to piecing.

Here is the border I was talking about.

The quilt is finished! The quilt is finished!

This is not the greatest photo, but the darks are all chocolate browns, the lights are all cream colors and the small square that travels around the quilt is a lovely burgundy. I do like how you can see right through the quilt.

This quilt took me a lot of time to put together, but careful piecing and cutting left me with a quilt that came together as a finished piece so well, without puckers or any other defects.

I can not wait to get this quilted and on my bed!

Heather


Sunday, January 20, 2013

Retreat Weekend

This weekend was retreat weekend! I look forward to this weekend all year. To make things even better, one of my friends was able to go along with me. Now, I am already anticipating next years retreat. What can be better than a weekend spent in a ballroom with sewing machines humming all around you. The variety of projects is so inspiring.

Here is my sewing station, which is empty because this was taken at about 7 this morning, before everyone else was up. Coffee, check. Mini Iron, check. Sewing machine functioning, check. I was able to put one project totally together except for trimming and borders. Another project was prompty started and is half completed.

This is my sewing partner, Diane. I had so much fun with my roomy. See her finished project, isn't it pretty amazing? This was here first retreat, I sure hope she had fun, so she will come back with me next year!

The demonstrations given by the retreat hostess, Kathy, were all focused on scraps. I purchased a Quilt in a Cup, which I hope to get done in the next few weeks. The others were very inspiring, but I try to wait on purchases. I did however stop at The Quilt Patch in Tecumseh, Michigan my FABULOUS local quilt store. My allowance has been spent.

While I did miss my little people and my husband immensely, it was awful fun to sew all weekend with no house cleaning, cooking, bath giving, basketball practice...

It was a fun and productive weekend, but now it is time to get my stuff put back away so I can get back to the normal sewing. The five minutes I can squeeze out between fixing dinner and folding laundry.

Heather


Sunday, January 13, 2013

Progress Has Been Made

Snake River Log Cabin, Snake River Log Cabin, Snake River Log Cabin... This has been the focus of the last few weeks in my world. Only 10 more blocks to sew. Only 300 more red and cream inch and a half squares to sew together. I think these are the only thought I have been having for the last little while.

My sewing area has been a disaster of piles, chains and boxes (used to organize the pieces).

Chains on the ironing board.

Chains to my right.

Chains to my left.

Box to my left with yet more chains! Not to mention the life juice, coffee!

Today I was able to put together all of the rows for my quilt and even put two of those rows together! The results are stunning. I can not wait until I get this together. I am starting to remember why I loved this quilt so much that I thought I needed to buy the kit and make it!

Please excuse the crummy picture, but I was too excited not to share. I am hoping to have this put together in time for show and tell at quilt retreat this weekend. We will see if that happens, since it is the end of the semester and grades need to be finished.

Who needs sleep anyway?

Heather


Saturday, January 5, 2013

Snake River Log Cabin Blocks

This Christmas Vacation I have kept busy with many things. Before we left on the last day of school, I made a list of the activities I wanted to do with my kids. We had fun making moon sand, popping packing bubbles, sledding, Battle Ship and a multitude of other fun stuff!

I have spent many hours with the sewing machine also. Over a year ago I started working on a Snake River Log Cabin quilt. This last week of vacation has seen my sewing machine, ironing board and staging area covered with various pieces of fabric ready to be assembled.

This is a picture of all 64 finished blocks for the center section of this quilt. It may not look like much and there is still so much left to sew, but I am so excited. After some quick mathematical calculations, these two piles are made up of 2816 pieces and 3008 seams (only I would be geeky enough to figure it out)!!!!!

This quilt has proven to be a challenge, which is good. The time I have invested in this quilt have prevented me from buying so many other projects to work on. I think I may need to invest in more complicated quilt projects like this one.

I can't wait to start assembling this fabulous quilt!

Heather